 These are very basic instructions - and it's not all that easy to pick up. I had been crocheting for over 30 years and I did a dozen bracelets before I was even beginning to be happy with my work! Do yourself a big favor and start with white thread and opaque seed beads. Only string about 18" of beads and think of it as a practice piece. If you want more detailed instructions, please consider "Bead Crochet Ropes" |
|
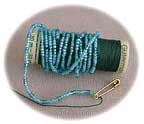
MATERIALS Hook: Size 10 (1.0 mm) USA Susan Bates or BoyeTM Thread: 100% Polyester Top Stitch weight thread
|
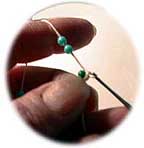
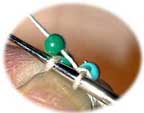
Remember.... The last bead strung will be the first bead worked! You will be working in a slip stitch helix, - each stitch having a single bead in it. There is no "step-up" in this work. Chain 6, with a bead in each stitch. Join your chain to the 1st stitch with a beaded slip stitch. Push the hook through loop on which 1st bead is fastened; push the first bead over the hook, down to the right (left) and BE SURE to bring the thread from the spool OVER the top of the bead. Slide down the next bead and fasten with a slip stitch. If you have strung six different colors of beads, then you will be pulling down the sane color bead as the stitch you are going to crochet under. Continue on in this manner, working in a slip stitch spiral, until the desired length is reached. Care should be taken to see that there are always 6 beads around and that your pattern is looking right. If not, then unravel the work back to where it is right! To finish the rope, Cut your thread, leaving a tail and pull through the last stitch. When you are ready for more advanced patterns, visit Bead-Patterns and do a search on Crochet. You will find basic free rope patterns there as well as many other wonderful designs More in-depth instructions and patterns can be
found in my |
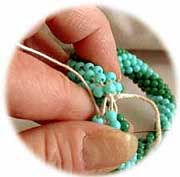 |
Endless Bracelet: To make an endless loop bracelet, thread one tail with a tapestry needle, mate both ends, matching design and sew it together by passing the needle UNDER each ending bead and catching the thread. When weaving, make sure to place the needle under the beads of the last six that were crocheted so that the bead stays on the correct side of the thread, just like you were crocheting another spiral. Each bead stitched should lie in the same direction as the others. Leave the first few stitches loose until you are sure the beads are matching up, then snug up tight. Weave the tail back into the crochet work and clip. |
|
|
| www.beadline.com Home All images, photographs and text © 1998-2008, Judith Bertoglio-Giffin All rights reserved. |
 Updated on November 2005 Updated on November 2005 |